Open CV
Install docker mage
run
$ docker ps
$ docker start 0c5f0bc9b04c
$ docker ps -a
We need to go Self terminal not SSH terminal
$ gksudo
open a bog
and type
lxterminal
Python and OpenCV.
Install docker mage
run
$ docker ps
$ docker start 0c5f0bc9b04c
$ docker ps -a
We need to go Self terminal not SSH terminal
$ gksudo
open a bog
and type
lxterminal
Python and OpenCV.
Alright, now we can finally start writing some code!
Open up a new file, name it test_image.py , and insert the following code:
1
2
3
4
5
6
7
8
9
10
11
12
13
14
15
16
17
18
19
20
|
# import the necessary packages
from picamera.array import PiRGBArray
from picamera import PiCamera
import time
import cv2
# initialize the camera and grab a reference to the raw camera capture
camera = PiCamera()
rawCapture = PiRGBArray(camera)
# allow the camera to warmup
time.sleep(0.1)
# grab an image from the camera
camera.capture(rawCapture, format="bgr")
image = rawCapture.array
# display the image on screen and wait for a keypress
cv2.imshow("Image", image)
cv2.waitKey(0)
|
We’ll start by importing our necessary packages on Lines 2-5.
From there, we initialize our PiCamera object on Line 8 and grab a reference to the raw capture component on Line 9. This rawCapture object is especially useful since it (1) gives us direct access to the camera stream and (2) avoids the expensive compression to JPEG format, which we would then have to take and decode to OpenCV format anyway. I highly recommend that you use PiRGBArray whenever you need to access the Raspberry Pi camera — the performance gains are well worth it.
From there, we sleep for a tenth of a second on Line 12 — this allows the camera sensor to warm up.
Finally, we grab the actual photo from the rawCapture object on Line 15 where we take special care to ensure our image is in BGR format rather than RGB. OpenCV represents images as NumPy arrays in BGR order rather than RGB — this little nuisance is subtle, but very important to remember as it can lead to some confusing bugs in your code down the line.
Finally, we display our image to screen on Lines 19 and 20.
To execute this example, open up a terminal, navigate to your test_image.py file, and issue the following command:
1
|
$ python test_image.py
|
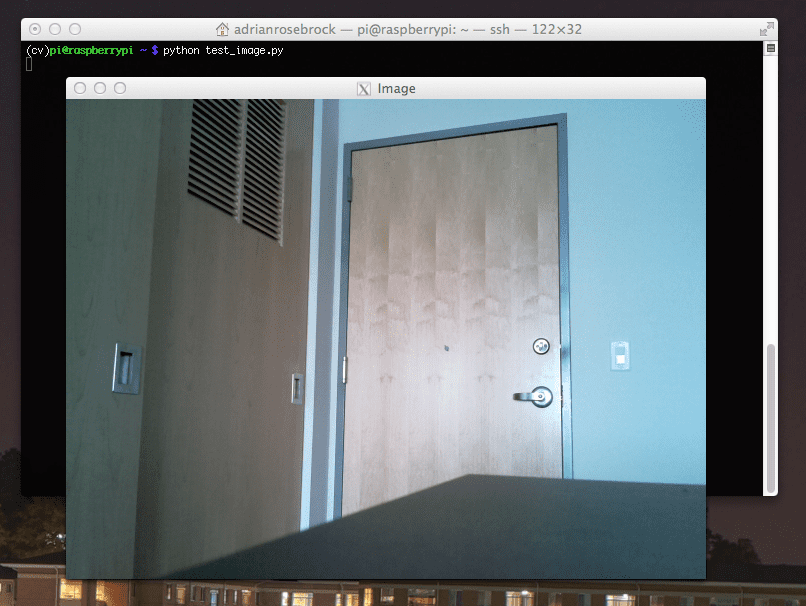
If all goes as expected you should have an image displayed on your screen:
Figure 6: Grabbing a single image from the Raspberry Pi camera and displaying it on screen.
Note: I decided to add this section of the blog post after I had finished up the rest of the article, so I did not have my camera setup facing the couch (I was actually playing with some custom home surveillance software I was working on). Sorry for any confusion, but rest assured, everything will work as advertised provided you have followed the instructions in the article!
Step 6: Accessing the video stream of your Raspberry Pi using Python and OpenCV.
Alright, so we’ve learned how to grab a single image from the Raspberry Pi camera. But what about a video stream?
You might guess that we are going to use the cv2.VideoCapture function here — but I actually recommend against this. Getting cv2.VideoCapture to play nice with your Raspberry Pi is not a nice experience (you’ll need to install extra drivers) and something you should generally avoid.
And besides, why would we use the cv2.VideoCapture function when we can easily access the raw video stream using the picamera module?
Let’s go ahead and take a look on how we can access the video stream. Open up a new file, name it test_video.py , and insert the following code:
1
2
3
4
5
6
7
8
9
10
11
12
13
14
15
16
17
18
19
20
21
22
23
24
25
26
27
28
29
30
31
|
# import the necessary packages
from picamera.array import PiRGBArray
from picamera import PiCamera
import time
import cv2
# initialize the camera and grab a reference to the raw camera capture
camera = PiCamera()
camera.resolution = (640, 480)
camera.framerate = 32
rawCapture = PiRGBArray(camera, size=(640, 480))
# allow the camera to warmup
time.sleep(0.1)
# capture frames from the camera
for frame in camera.capture_continuous(rawCapture, format="bgr", use_video_port=True):
# grab the raw NumPy array representing the image, then initialize the timestamp
# and occupied/unoccupied text
image = frame.array
# show the frame
cv2.imshow("Frame", image)
key = cv2.waitKey(1) & 0xFF
# clear the stream in preparation for the next frame
rawCapture.truncate(0)
# if the `q` key was pressed, break from the loop
if key == ord("q"):
break
|
This example starts off similarly to the previous one. We start off by importing our necessary packages on Lines 2-5.
And from there we construct our camera object on Line 8 which allows us to interface with the Raspberry Pi camera. However, we also take the time to set the resolution of our camera (640 x 480 pixels) on Line 9 and the frame rate (i.e. frames per second, or simply FPS) on Line 10. We also initialize our PiRGBArray object on Line 11, but we also take care to specify the same resolution as on Line 9.
Accessing the actual video stream is handled on Line 17 by making a call to thecapture_continuous method of our camera object.
This method returns a frame from the video stream. The frame then has anarray property, which corresponds to the frame in NumPy array format — all the hard work is done for us on Lines 17 and 20!
We then take the frame of the video and display on screen on Lines 23 and 24.
An important line to pay attention to is Line 27: You must clear the current frame before you move on to the next one!
If you fail to clear the frame, your Python script will throw an error — so be sure to pay close attention to this when implementing your own applications!
Finally, if the user presses the q key, we break form the loop and exit the program.
To execute our script, just open a terminal (making sure you are in the cv virtual environment, of course) and issue the following command:
Comments
Post a Comment